
 Strategic Business Innovation and Execution by Andrew Hillman | Data-Driven Growth Insights for Modern Enterprises
  Nitun Ahir Advancing Preventive Healthcare Through Clinical Expertise and Innovation
 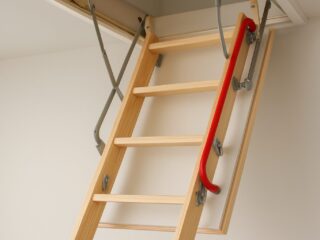 Loft Ladder Safety for Families: Protecting Children and Older Adults
  Professional AC Tune-Up Services for Better Cooling Efficiency and Reliable Performance
  Jack Johnson — Upside Down: Exploring the Digital Popularity and Timeless Appeal of a Memorable Song
  Which Forex Is Best for Beginners – Start Trading with Confidence
  24hr In-Home Care Novi – 24hr In-Home Care Novi | Around-the-Clock Home Care Services
  IWC Replica – Premium Aviation Inspired Luxury Watch Designs
Toilet flush handles are an essential component of your toilet, as they are responsible for flushing your toilet after use. Over time, these handles may become loose, rusted, or broken, making them ineffective. When this happens, it’s time to consider replacing them. Most people opt to hire a professional to replace toilet flush handles, but as you’ll learn in this guide, it’s an easy DIY task. Keep reading to find out everything you need to know about replacing your toilet flush handle.
Gather Your Supplies
Before you start the replacement process, you’ll need to gather a few tools. You’ll need a new toilet flush handle, a basin wrench, and a flat-head screwdriver. Depending on your toilet’s model, you may also need an adjustable wrench and pliers. It’s essential to have all of your supplies ready before you start working to avoid any delays.
Remove the Old Handle
The first step in replacing your old toilet flush handle is to remove it. Locate the nut that connects the handle to the actual flushing mechanism. Then loosen the nut with your basin wrench or pliers and remove it. Once the nut is removed, you can also remove the old handle from the toilet. If the nut is too tight or rusted, you may need to use some WD-40 or vinegar to loosen it.
Install the New Handle
After removing the old handle, it’s time to install the new one. Start by sliding the new handle into the hole that connects to your toilet’s flushing mechanism. You’ll notice that there is a small metal thread that will allow you to screw on the nut. Tighten the nut with your basin wrench or pliers until it is secure. Make sure not to overtighten the nut, as it could cause damage to the toilet’s flushing mechanism.
Testing the New Handle
Once the new handle is installed, you’re ready to test it. Flush your toilet a few times to ensure that it’s working correctly. If the handle is too loose or tight, make adjustments as necessary. The handle should be easy to push down and not require a lot of force.
Maintenance Tips
To maintain your new toilet flush handle, you should clean it regularly with a damp cloth. You can also use a mild detergent to remove any dirt or grime that accumulates. Avoid using harsh chemicals or abrasive cleaners, as they could damage the finish on the handle. If you notice any loose nuts or bolts, tighten them immediately to prevent any long-term damage. It’s also essential to remember that toilet flush handles are replaceable, so don’t hesitate to replace yours if it fails again.
Conclusion:
Replacing your toilet flush handle is a simple DIY task that anyone can do with the right tools and a bit of patience. Make sure to gather all of your supplies before starting the process and follow the steps outlined in this guide. The most critical thing to keep in mind is ensuring the handle is installed securely and is not too loose or tight. With proper maintenance, your new toilet flush handle should last for years to come.


